
Follow these easy steps to update your bathroom sink faucet.

You don’t need to completely renovate your bathroom to change things up. With a few tools and a little bit of time, replacing your bathroom sink faucet is a quick-and-easy update that is well worth effort.
In the steps below, we’ll show you how to install a Delta® Single-Handle Sink Faucet with confidence.
It’s a little improvement project you can tackle in no time, but when you’re finished, you’ll see a big difference in how your bathroom looks and feels right away.
Tools and Supplies Needed:
- 2 adjustable wrenches
- Safety glasses
- Towel
- Pot/bucket
- Flashlight
- Plumbers tape (if you are replacing the drain)
- Silicone (if you are working with an uneven sink surface)
Single-handle bathroom faucets are designed for a one-hole or 4-inch three-hole sink configuration. This installation guide is for a single hole configuration. If you have a 4-inch three-hole configuration, you will need to use the included Escutcheon plate which will cover the holes you won’t be using. Simply feed the pex supply lines through the plate and run it up the lines. You want to feed the mounting stud on the faucet into the hole on the plate.
Also, note that if your faucet has gray supply lines included then you know you have what is called a DST faucet. If it is not a DST faucet then you will need to provide your own supply lines and connect them separately.
Make sure you turn off your water under the sink before beginning.
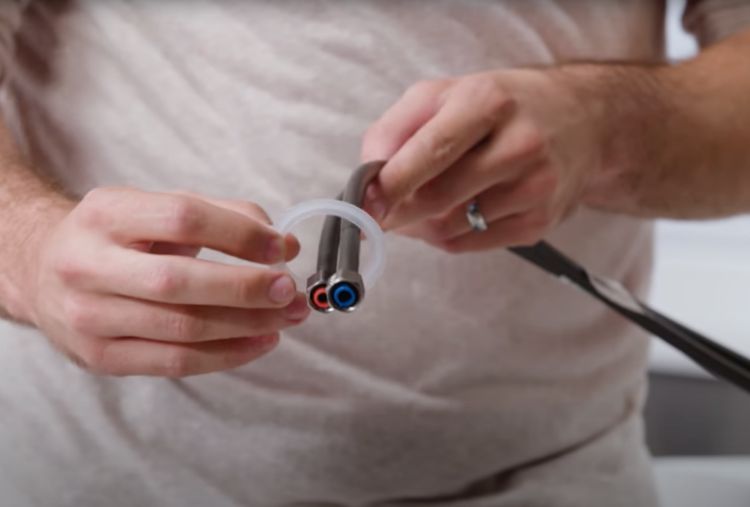
Grab the plastic gasket and hold it ridge side up. Feed the pex supply lines through the gasket and move it up against the bottom of the faucet. Don’t remove the tag on the lines as it has a lot of important information regarding the make and model of your faucet. Feed the supply lines through the center hole on the sink. If your sink isn’t smooth and made out of tile, for example, add a ring of silicone around the hole before placing your faucet on the sink to ensure a watertight seal.
If you have another person helping, hold the faucet as they hop under the sink to secure the faucet to the sink deck. Otherwise, you can tighten it slowly and check along the way that it is level. First grab the bracket included in the packaging and make sure the bumps face up and the curved side faces the back of the wall. Feed it onto the mounting stud and use the preloaded wrench that was included in the packaging and screw the nut onto the mounting stud.
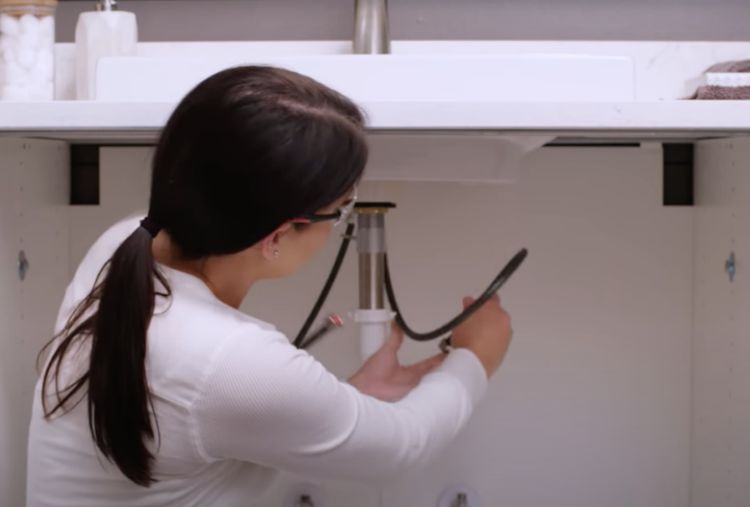
Your lines should be color coded, red for hot and blue for cold. Start with blue and attach them to the cold water stub-out by hand tightening the nut. You will see a diamond pattern on top of the nut; You want to use that diamond pattern as a guide to know when you have done one 360-degree rotation with your adjustable wrench. Now repeat with the red line.
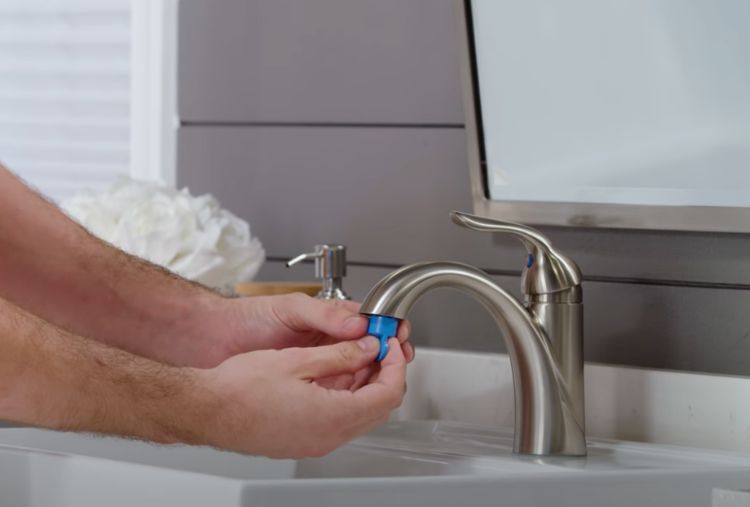
You will want to flush the line before use to make sure there isn’t any debris in the faucet from installation which could restrict the flow. Turn the water under the sink back on so that you can flush the faucet up top. While you are down there, check for leaks. Grab your aerator wrench that is included in your packaging. Notice the little teeth in the wrench that will fit into the aerator cartridge that’s on the underside of your spout. Give it a couple of turns to unscrew the cartridge from the spout and set to the side. Turn the faucet on at full mix position (straight up in most cases) to ensure you are pulling from both lines. Cover the faucet with a washcloth or rag to keep the splashing at bay and run the water for about 30 seconds to flush out any debris. Replace the aerator cartilage by putting in the wrench first and rethreading it onto the spout. Check for leaks.
In just three easy steps, your bathroom sink will instantly be elevated and you can see and feel the difference.